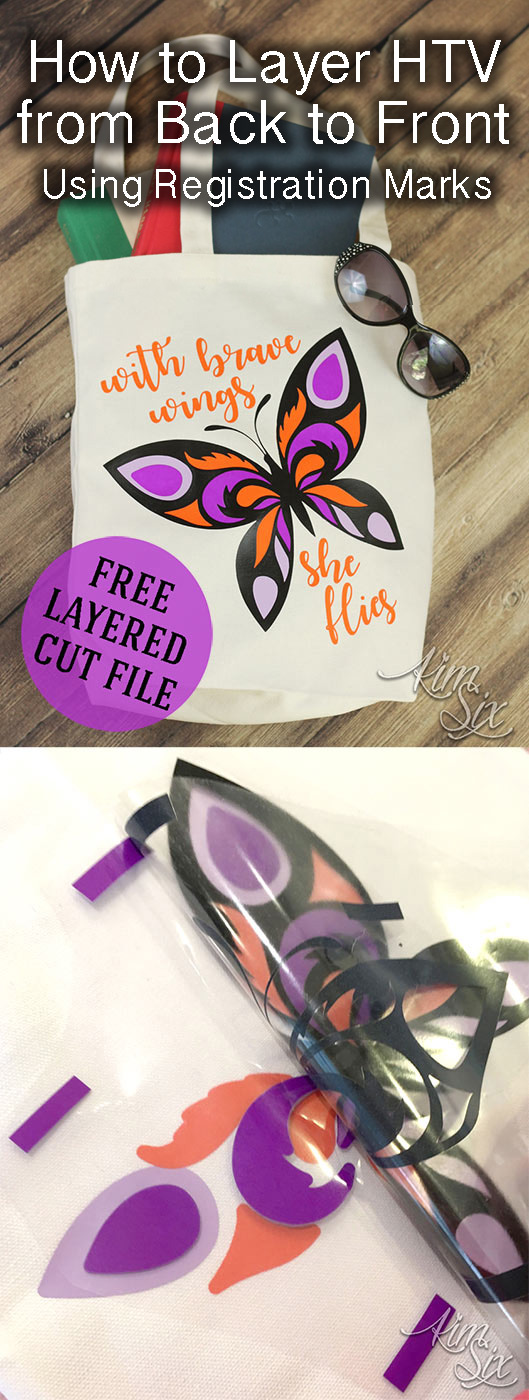
Lately I have stumbled into a lot of heat transfer vinyl projects since my kids are always asking to have things personalized, or I find a design I just love and want to put it on something. Things like personalized shirts and bags for Disney are a few examples. I’ve also been adding names to the back of sports jerseys and school fundraiser t-shirts recently.
The problem with the diversity in these projects is that not all HTV plays nice with all materials. HTV that works well on performance wear tends to not work as well for thick textures canvas or denim.. and vice versa.
Until now.
Happy Crafters has launched a new brand of heat transfer vinyl called Craft Perfect. The beauty of this type of vinyl is that it can be applied to ANYTHING: Cotton, Poly Blends, Leather, even spandex and performance wear. They asked me to try it out and since I had a tote bag project I wanted to tackle, I thought I would give it a go.
I had this file I wanted to add to a library tote bag for the summer, but I wanted an HTV that could hold up to the texture of the bag even in the fine details of the text.

I also wanted to layer the butterfly where the thin black outline layer was the UPPERMOST layer.. and not put the colors on top of the black. So that made this project even trickier. Could the Craft Perfect hold up?
How to Layer HTV From Back To Front Using Registration Marks
Step 1: Cut all the layers including registration marksThe colors I’m working with for this specific project were Neon Purple, Sharp Cheddar and Lilac, along with Black. I created the file, added registration marks and then split it by color. I made sure the registration marks showed up on every layer.

Step 2: Layer design aligning with registration marks
Once I had cut and weeded all the layers, I took the bottom most color, still attached to the transfer sheet and added the next layer on top of it USING THE REGISTRATION MARKS. This is important. Since you won’t be able to know exactly where each color will go, you need to line up those blocks on top of each other since you are basically placing the layers blind.
Yes, you will be sticking the transfer sheet on top of the vinyl, but it okay. It won’t pull it up.. don’t worry.

Step 3: Cut away registration marks and place design onto fabric
Once you have the completed layered image all stuck together you can cut away the registration marks. You don’t need them anymore. You can leave the if you want, but you will have to be careful to avoid them with the iron. (I left mine but I didn’t have to!) Next place your image down where you want it.
The font in this file doesn’t include registration marks since I wanted to place it where I liked it relative to the bag.. If alignment isn’t essential for the design you can always just place those parts freehand.

Step 4: Carefully peel all the backing layers away from the bottom color, leaving it in place on the fabric
Once you know where you design will go, you have to start pressing down the layers. Leaving the design in place on the fabric, you want to remove all but the bottom most layer. MAKE SURE YOU DON”T SEPARATE THE REMAINING TOP LAYERS. These have been aligned correctly and you don’t want them to shift.
Step 5: Press bottom HTV layer onto fabric, remove backing
You are only pressing down the bottom most layer. You can see how close my registration mark was to my image, so I did end up using a scissors to cut it away to make pressing easier. If you are using a heat press you HAVE to cut away the registration marks.

Step 6: Repeat process by aligning entire layered design onto your surface
Once you have the first layer down, you are going to use this as you new ‘registration’ mark. Use it to line up the rest of the image. The beauty of this technique is that your are using the FULL IMAGE to determine layer placement every time. So you will automatically know if something is in the right place. And you can reposition it if it is off
In this case I used the Lilac on the bottom, so I would easily center the rest of the design making sure the Lilac completely filled the space in the wings.
 Step 7: Peel back all but the bottom layer
Again, you want to peel back all but the bottommost layer, making sure not to shift it at all.

Step 8: Press and repeat
Press this new (second) layer down and repeat the process until all the layers have been added.

This is what my colors looked like before adding the top black outline. There is no way I could have aligned this correctly by eye.

Now my final layer. I love that the black sealed down the bottom layers and gave me nice crisp lines without any bulk on top.

The only part of the design that is more than one layer thick is the dark purple spot on top of the lilac at the tips of the wings. Everything else is just a single layer thick.

I think it came out beautifully, and the Craft Perfect performed wonderfully. The finish s smooth and even.

And now the girls’ library bag is ready for summer!

Get your Craft Perfect vinyl directly from Happy Crafters.
For this project I used my Silhouette Cameo, but it could have also easily been cut with my Circuit Explore.
You can get the layered cut files by email below:


